- Powering the i-Pilot Link Remote On and Off
- Rotate the Bluetooth i-Pilot Link Touch Screen
- Customize the Bluetooth i-Pilot Link Remote Menu Layout
- Languages Available for the i-Pilot Link Remote Display
- Lock and Unlock the Remote
- Adjust the Backlight Brightness
- Adjust the Backlight Timeout
- Set the Remote Auto Off
- Change the Distance Units
- Change the Speed Units
- Change the Time Format
- Change the Time Zone
- Toggle Daylight Savings
- Restore Defaults
- Range of the Remote
- Resources
Powering the i-Pilot Link Remote On and Off
-
Turn the Remote On
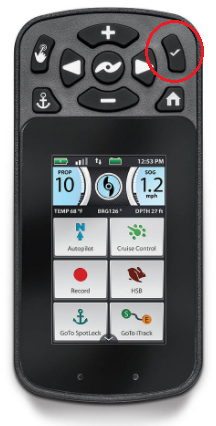
Press the OK button once. -
Turn the Remote Off
Press and hold the OK button for 3 seconds.
Rotate the Bluetooth i-Pilot Link Touch Screen
If you prefer the remote buttons to be orientated below the touch screen, the i-Pilot Link remote has the option to orientate the screen to accommodate this preference. Once you orientate the screen, you can hold the remote with the buttons below the touch screen and the screen will be right reading. When orientating the screen, the Steer Right button, and the Steer Left button swap functions in order to correct the position of the remote.
- Press the Home button.
- Scroll through the Content Area using either your finger or the Screen Navigation button to find the Options button.
- Select the Options button using either your finger or by pressing the Ok button to open the Options Menu.
- Once in the Options Menu, scroll through to find the Screen Rotate option. By default, the Screen Rotate is toggled "off".
- To toggle Screen Rotate "on", press the Screen Rotate option. The Screen Rotate toggle will turn green to indicate Screen Rotate on is turned "on". The orientation of the screen will also rotate 180 degrees.
Notice: When the Screen Rotate toggle is turned "on" the Steer Right button and Steer Left buttons swap functions. If the remote is then held so that the screen is right reading, the steering buttons will also control the motor in the correct direction.
Customize the Bluetooth i-Pilot Link Remote Menu Layout
The i-Pilot Link remote allows the buttons in the Home Screen menu to be rearranged. This allows the user to move favorites or frequently used buttons to the top of the menu. See steps below or review the "Remote Controls" section of the i-Pilot Link owners manual.
- Press the Home button
- Scroll through the Content Area using either your finger or the Screen Navigation button to find the "System" button.
- Select the System button using your finger or by pressing the "OK" button to open the System Menu.
- Once in the System Menu, scroll through to find the "Menu Edit" option and select it.
- Once the "Menu Edit" is selected, the display screen will return to the Home Screen Buttons and display the on-screen prompt to "Select icon to move". Select the desired icon to move.
- Select the desired placement of the selected icon. Repeat the selection and placement of all desired icons until the Home Screen Button Menu is as desired.
- When done, select the "Save" button to keep the new arrangement, or select the "Cancel" button to return to the previous menu arrangement.
Languages Available for the i-Pilot Link Remote Display
The i-Pilot Link remote has options for English, Danish, Dutch, Finnish, French, German, Greek, Hungarian, Italian, Norwegian, Polish, Portuguese, Spanish, Swedish, Czech, Croatian, and Russian. The owner's manual details how to change the language on page 101.
Lock and Unlock the Remote
- Press the Home button.
- Use the Menu Up and Menu Down buttons to find the Lock menu at the bottom of the display screen.
- Use the Right Softkey to select the Lock option. Do this by pressing and holding the corresponding softkey for 3 seconds. Once the screen is locked, the menu at the bottom of the display screen will read Unlock.
- To Unlock the display screen use either the Left Softkey or Right Softkey to select the Unlock option. Do this by pressing and holding the corresponding softkey for 3 seconds.
- Once the screen is unlocked, it will return to the Home menu.
Adjust the Backlight Brightness
- Press the Home button.
- Use the Menu Up and Menu Down buttons to find the Options menu at the bottom of the display screen.
- Use the Left Softkey to select the Options menu.
- In the Options menu, use the Menu Up and Menu Down buttons to find the Backlight selection. Press the Ok button to select it.
- In the Backlight menu, use the Menu Up and Menu Down buttons to find the Brightness selection. Press the Ok button to select it.
- Use the Menu Up and Menu Down buttons to adjust the screen to the desired brightness.
- Once the desired brightness is found, press the Right Softkey to Close the menu or the Home button to exit the menu.
Adjust the Backlight Timeout
- Press the Home button.
- Use the Menu Up and Menu Down buttons to find the Options menu at the bottom of the display screen.
- Use the Left Softkey to select the Options menu.
- In the Options menu, use the Menu Up and Menu Down buttons to find the Backlight selection. Press the Ok button to select it.
- In the Backlight menu, use the Menu Up and Menu Down buttons to find the Timeout selection. Press the Ok button to select it.
- Use the Menu Up and Menu Down buttons to find the desired Backlight Timeout. Use the Ok button to select it. The circle to the right of the selected Backlight Timeout will become solid when selected.
- Once the desired Backlight Timeout is found, press the Right Softkey to Close the menu or the Home button to exit the menu.
Set the Remote Auto Off
- Press the Home button.
- Use the Menu Up and Menu Down buttons to find the Options menu at the bottom of the display screen.
- Use the Left Softkey to select the Options menu.
- Use the Menu Up and Menu Down buttons to find the Auto Off menu. Use the Ok button to select it.
- Use the Menu Up and Menu Down buttons to find the desired option. Use the Ok button to select it. The circle to the right of the selected Auto Off option will become solid when selected.
Change the Distance Units
- Press the Home button.
- Use the Menu Up and Menu Down buttons to find the Options menu at the bottom of the display screen.
- Use the Left Softkey or Right Softkey to select the Options menu.
- Use the Menu Up and Menu Down buttons to find the Units menu. Use the Ok button to select it.
- Use the Menu Up and Menu Down buttons to find the Distance menu. Use the Ok button to select it.
- Use the Menu Up and Menu Down buttons to scroll to the desired unit of measurement. Use the Ok button to select it. The circle to the right of the selected Distance Unit will become solid when selected.
Change the Speed Units
- Press the Home button.
- Use the Menu Up and Menu Down buttons to find the Options menu at the bottom of the display screen.
- Use the Left Softkey to select the Options menu.
- Use the Menu Up and Menu Down buttons to find the Units menu. Use the Ok button to select it.
- Use the Menu Up and Menu Down buttons to find the Speed menu. Use the Ok button to select it.
- Use the Menu Up and Menu Down buttons to scroll to the desired unit of measurement. Use the Ok button to select it. The circle to the right of the selected Speed Units will become solid when selected.
Change the Time Format
- Press the Home button.
- Use the Menu Up and Menu Down buttons to find the Options menu at the bottom of the display screen.
- Use the Left Softkey to select the Options menu.
- Use the Menu Up and Menu Down buttons to find the Time menu. Use the Ok button to select it.
- Use the Menu Up and Menu Down buttons to find the desired time display option. Use the Ok button to select it. The circle to the right of the selected time format will become solid when selected.
Change the Time Zone
- Press the Home button.
- Use the Menu Up and Menu Down buttons to find the Options menu at the bottom of the display screen.
- Use the Left Softkey to select the Options menu.
- Use the Menu Up and Menu Down buttons to find the Time menu. Use the Ok button to select it.
- Use the Menu Up and Menu Down buttons to find the Time Zone menu. Use the Ok button to select it.
- Use the Menu Up and Menu Down buttons to find the desired Time Zone. Use the Ok button to select it. The circle to the right of the selected Time Zone will become solid when selected.
Toggle Daylight Savings
- Press the Home button.
- Use the Menu Up and Menu Down buttons to find the Options menu at the bottom of the display screen.
- Use the Left Softkey to select the Options menu.
- Use the Menu Up and Menu Down buttons to find the Time menu. Use the Ok button to select it.
- Use the Menu Up and Menu Down buttons to find the Daylight Savings menu.
- Use the Ok button to toggle the check box On and Off.
Restore Defaults
- Press the Home button.
- Use the Menu Up and Menu Down buttons to find the System menu at the bottom of the display screen.
- Use the Right Softkey to select the System menu.
- Use the Menu Up and Menu Down buttons to find the Restore Defaults option. Use the Ok button to select it.
- Use the Left Softkey to select the Restore option.
Range of the Remote
The range of the Bluetooth i-Pilot Link Remote is 30 feet. The range of the remote will be greatly reduced if it is used near or mounted to any metal object including aluminum or steel. It is also recommended that the front end of the remote not be obstructed during use.